This article applies to:
Question:
- How do I add a user individual profile to the LDAP filter settings?
Reply:
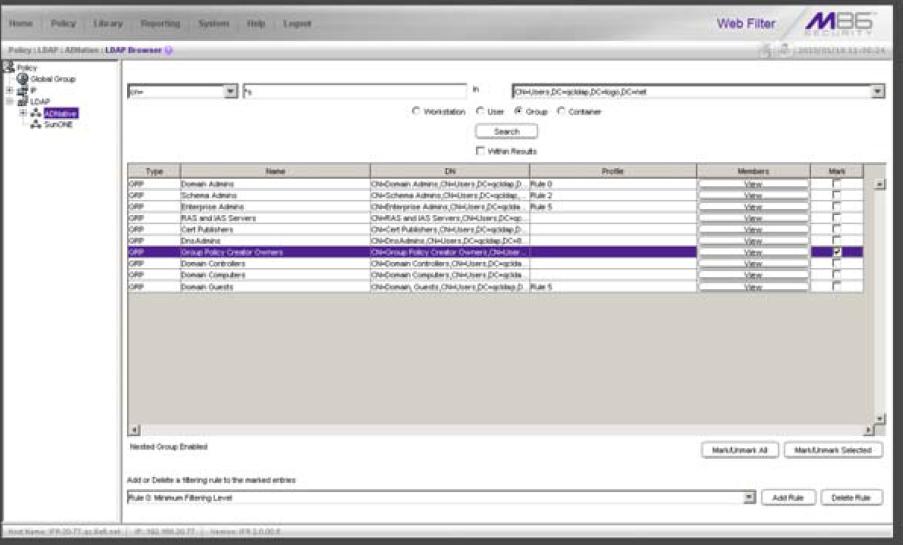
Select the LDAP domain, and choose “Manage Profile Objects” from the pop-up menu. A window will display with an option to run a search for names of workstations, users, groups, or containers from an LDAP domain, so that a filtering profile can be assigned to each node.
Specify the type of search by clicking the “Workstation”, “User”, “Group”, or “Container” radio button.
If “User” or “Group” was selected, choose either “cn=” (common name) or “uid=” (user ID) from the pull-down menu for the attribute type used in the LDAP directory. This menu displays greyed-out if “Container” was selected.
In the input field that follows the pull-down menu, type in the workstation name, username, group name, or entered on the LDAP server, or enter a partial name followed by the asterisk (*) wildcard. For example: *doe*
Make a selection from the “In” pull-down menu to specify the section of the server to search, and click on the “Search” button.
When the user is found, go to the” Mark” column and click the checkbox for that entity. Select a filtering rule from the drop-down menu and click “Add Rule” to display the selected Rule number in the Profile column.
Notes:
Optional.