6.6 Working With Access Policy
To work with rules in the WebMarshal Console, ensure that the menu item Access Policy is expanded.
6.6.1 Creating a Rule or Rule Container
WebMarshal Rules and Rule Containers have many elements in common. The procedure below illustrates the creation of an example rule. The available options are covered in the following sections.
1.In the left pane of the Console, expand Access Policy. Select a rule type.
2.If you want to create the rule within a container, double-click the container in the right pane to open it.
3.Click the New Rule icon in the taskpad.
4.Click Next to continue to the User Matching Conditions page.
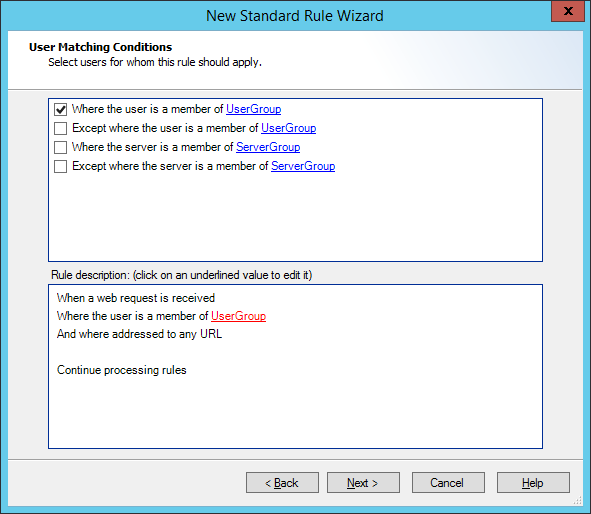
5.On the User Matching Conditions page, check the boxes in the top pane to select the conditions you want to include in the rule. The items you select items display in the rule description pane, at the bottom of the page.
6.If you can specify details for a condition, each item that requires details includes a hyperlink. The hyperlink text is red if you must enter a value, or blue if a value is already specified. Click any hyperlink to enter or change the detail information. For more information about the specific expressions, see “User Matching Conditions”.
7.For instance, if you select where the user is a member of User Group, the text UserGroup in the rule description is a red link. Click this link to display the Select User Groups window.
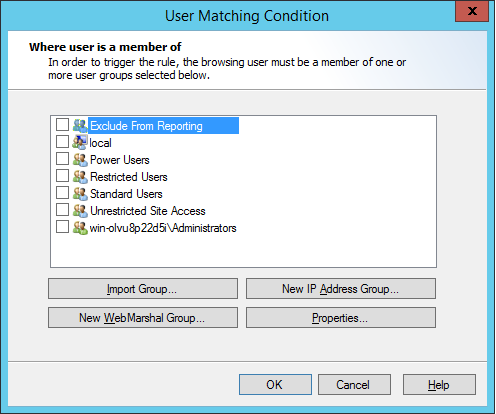
In this window, you can select an existing user group. You can also create or import a new group. If you create or import a group, it is selected for use when you return to the Select User Groups window.
|
Note: If your WebMarshal installation uses more than one type of authentication, remember to include all authentication types in Rules. For instance, if WebMarshal uses both Windows and IP authentication, User Matching should include both user names and workstation names as appropriate. |
8.Click Next to continue to the Rule Conditions page.
9.Select conditions and enter details on this page in the same way as for 5.. See “Rule Conditions” for details on options for the specific conditions.
10.When you have entered all the details on the Rule Conditions page, click Next to continue to the Rule Actions page.
11.Select actions and enter details on this page in the same way as for 5.. The actions that you can select vary depending on the type of rule. See “Rule Actions” for details on options for the specific actions.
12.When you have entered all details on the Rule Actions page, click Next to continue to the Rule Completion page.
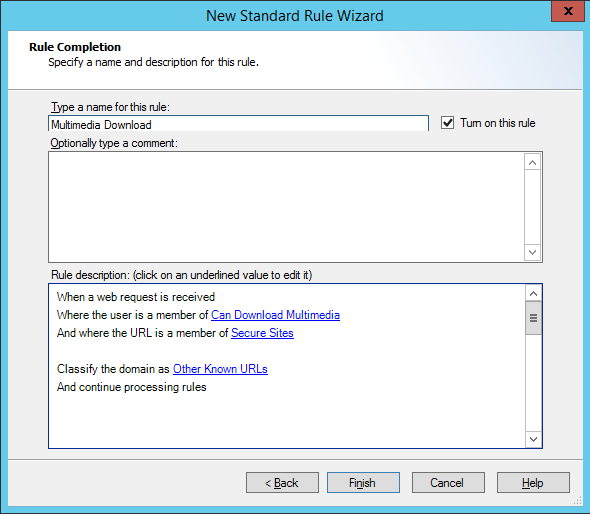
13.Enter a name for the rule.
14.Optionally enter a comment or description for the rule.
15.Choose whether to enable the rule immediately (default) or not, using the Turn on this rule checkbox.
16.Click Finish to return to the WebMarshal Console.
|
Note: The order of evaluation of rules is important. WebMarshal bases its action on the first rule triggered. You can adjust the order of evaluation. See “Understanding the Order of Evaluation”. Changes only take effect when you commit configuration. To commit configuration, click the Commit Configuration icon |
The following procedure applies to all types of WebMarshal Rules and Rule Containers.
To edit a rule or rule container:
1.In the left pane of the console, expand Access Policy.
2.Select the Rule type or Rule Container that includes the item you want to edit.
3.Double-click the rule or rule condition in the right pane. The rule is presented in the Rule Wizard–Rule Completion page.
4.Click any hyperlinked item to change it. If you want to make more basic changes to the actions or conditions, click Back to view the User Matching, Conditions, or Actions pages.
5.When satisfied, click OK.
6.6.3 Enabling and Disabling Rules
You can enable or disable individual rules or rule containers. Disabled rules (or rules in disabled containers) are not used to evaluate web requests. Disabled rules and containers display with a rule-disabled icon (dimmed, with a red X, as shown below).
Figure 21: WebMarshal Console, Rules window
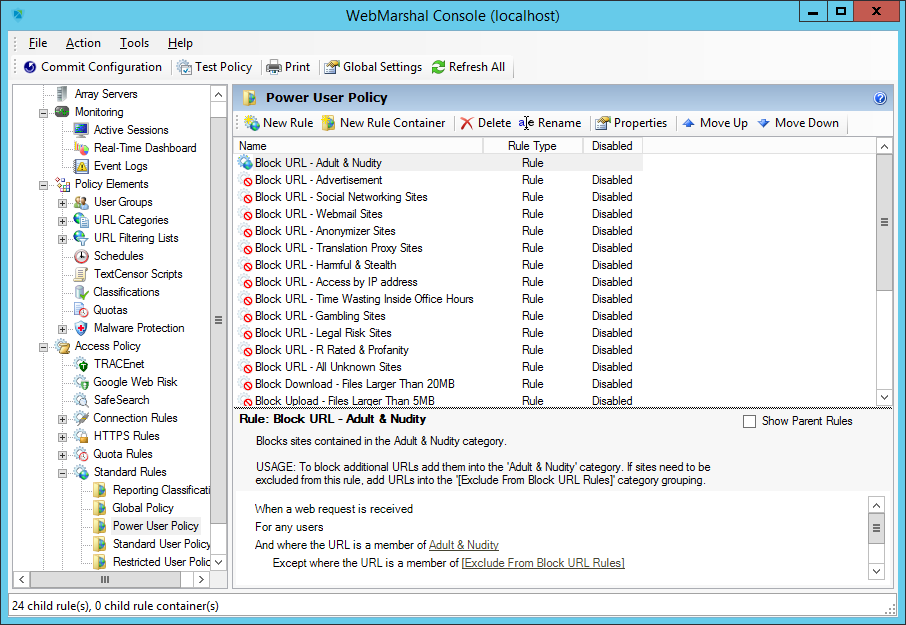
1.Expand Access Policy, and select a rule type in the left pane.
2.Double-click a particular rule or rule container in the right pane.
3.On the Rule Wizard page, check or uncheck Turn on this rule.
4.Click OK.
You can also enable, disable, or delete Rules and rule containers using a right-click context menu. You can select multiple rules for these actions by using shift-click and control-click.
|
Caution: When you delete a rule container, all the items it contains are also deleted. |

