This article applies to:
Question:
- How to set up an SWG scanner to integrate with ICAP server.
Notes:
There are several global details to be considered before you proceed with the setup:
1) ICAP client functionality should be enabled on the SWG scanner you are setting up to work with ICAP server.
2) Any given content sent to SWG proxy is first processed/scanned through the rules of SWG Security policy, both for HTTP requests and HTTP responses.
If no action is taken by SWG Security policy, this content is then forwarded to the ICAP Server for modification, based on the rules set in ICAP Request/Response Modification policies.
3) This Knowledgebase article does not provide any guidance as to how ICAP Server policy should be set up to process the web traffic forwarded for modification by the SWG scanner.
4) Review KB #16573 for detailed steps to set up Trustwave SWG ICAP Client to integrate with Trustwave SWG ICAP Server.
Procedure:
This Knowledgebase article provides generic instructions on how to set up a Trustwave SWG ICAP Client to integrate with any ICAP Server.
1. Navigate to Administration > System Settings > SWG Devices.
2. Under the Scanning Server, select ICAP Client and make sure the Enable ICAP Client check box is on:
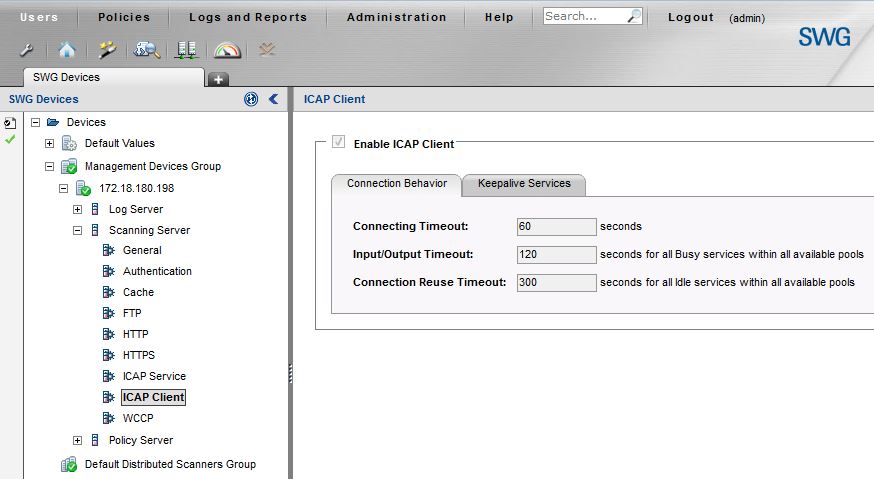
Then define the related configuration settings by following the steps below.
3. Navigate to Policies > Condition Elements > ICAP Service Groups.
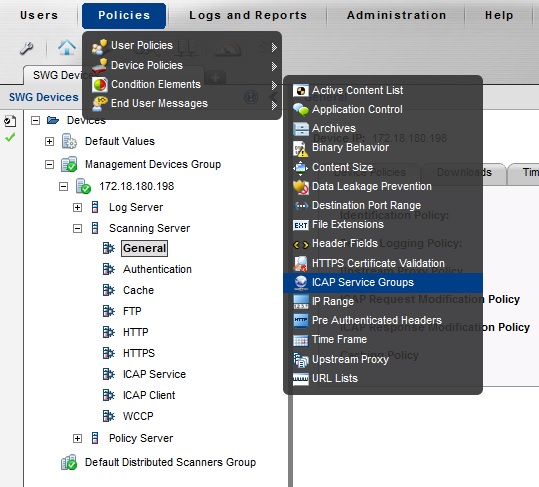
Normally, ICAP Client/Server communication is based on a series of ICAP Request modification and ICAP Response modification requests.
4. Set up the ICAP Request modification component:
a. Right-click ICAP Service Groups in the left pane and choose Add Group.
b. Define a name for the group, and in the Method field, select REQMOD, as shown below:
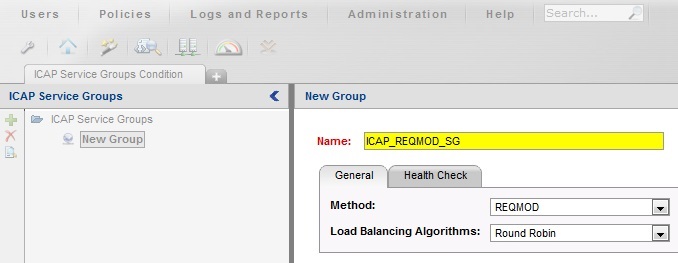
After you save the changes, this new ICAP Service group object should appear in the list in the left pane.
5. Right-click the new object in the left pane and choose Add Service.
6. Define a name for the service and select the Enable ICAP Service check box.
7. Set the Service URI according to the requirements of the ICAP server and save the changes.
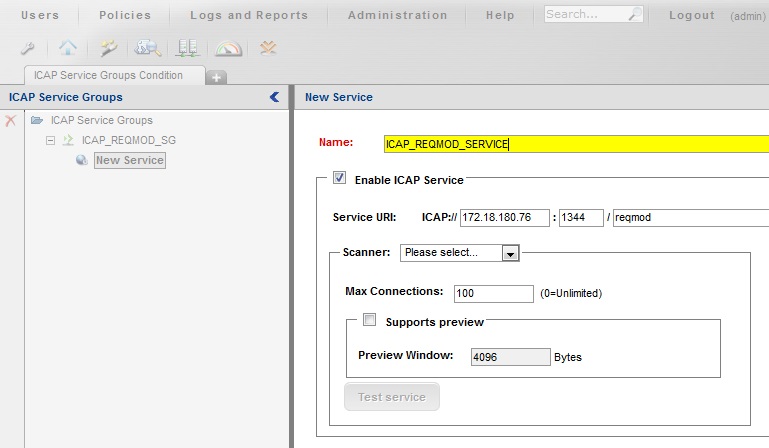
For example:
Service URI for ICAP REQMOD of Trustwave SWG ICAP Server is - ICAP://<SERVER-IP>:1344/Trustwave_REQMOD
Service URI for ICAP REQMOD of Trustwave DLP ICAP Server is - ICAP://<SERVER-IP>:1344/reqmod
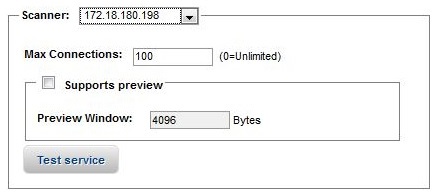
8. The ICAP Service module allows you to test service settings assuming that the ICAP Server is also set up to work with SWG ICAP client.
Choose a scanner you want to test the service with and click the Test service button:
The screen below opens if both ICAP Server and Client are set correctly to work with this ICAP Reqmod service.
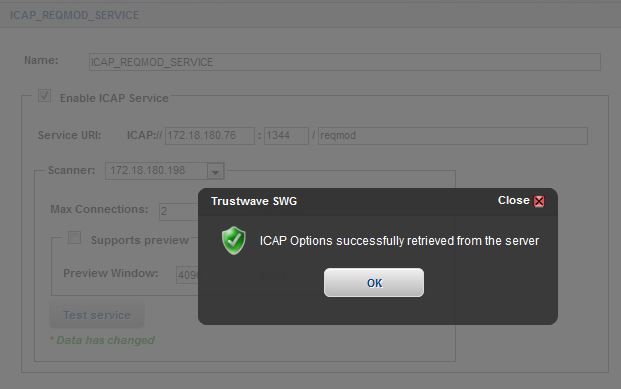
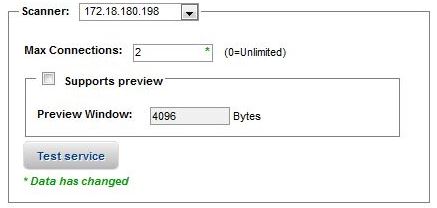
Also, you may see the Max Connections number change as a result of ICAP options negotiation taking place during the service test:
9. Set up the ICAP Response modification component:
a. Right-click the ICAP Service Groups object in the left pane and choose Add Group.
b. Define a name for the group, and in the Method field, select RESPMOD, as shown below:
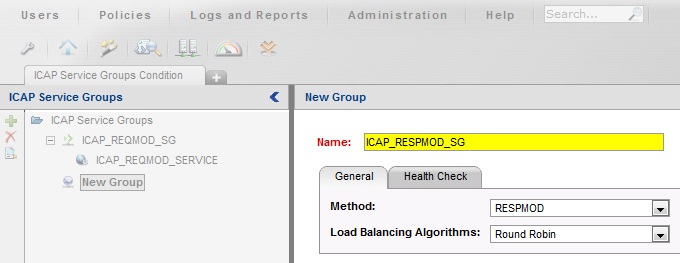
After you save the changes, this new ICAP Service group object should appear in the list in the left pane.
10. Right-click the new object and choose Add Service.
11. Define a name for the service, and select the Enable ICAP Service check box.
12. Set the Service URI according to requirements of the ICAP server and save the changes.
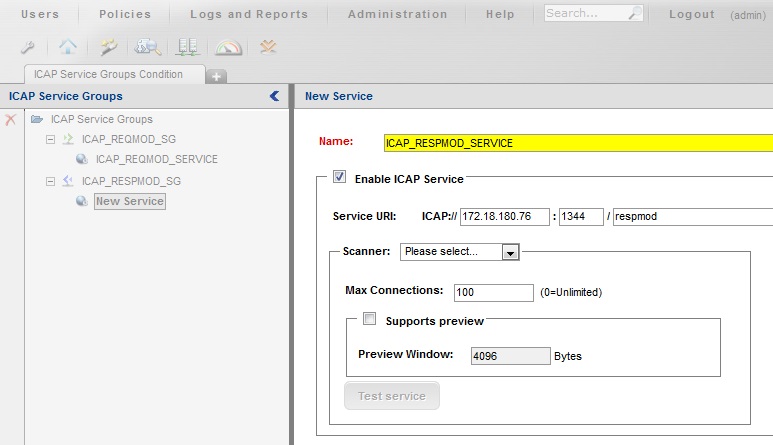
For example:
Service URI for ICAP RESPMOD of Trustwave SWG ICAP Server is - ICAP://<SERVER-IP>:1344/Trustwave_RESPMOD
Service URI for ICAP RESPMOD of Trustwave DLP ICAP Server is - ICAP://<SERVER-IP>:1344/respmod
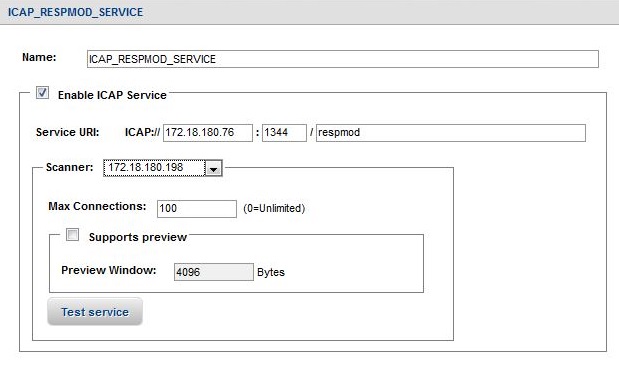
13. You may want to test the ICAP RESPMOD service, selecting a specific SWG scanner to test:
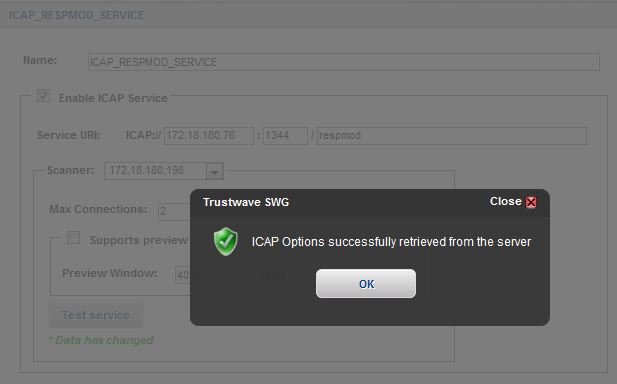
The screen below opens if both ICAP Server and Client are set correctly to work with ICAP Respmod service:
Next, define the ICAP policies to control what should be sent to the ICAP server either with ICAP Reqmod or ICAP Respmod service, or both:
14. Navigate to Policies > Device Policies > ICAP Request Modification.
15. Right-click Policies in the left pane and choose Add Policy to create a new ICAP Reqmod policy.
16. Define a name for the policy, save the changes and make sure it appears in the list of policies in the left pane.
17. Right-click the new policy and choose Add Rule.
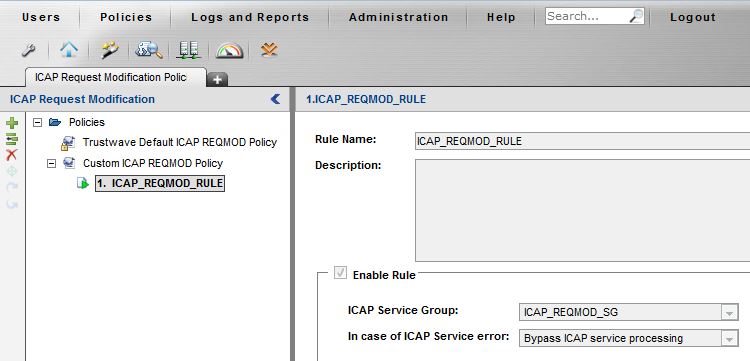
18. Set the correct ICAP Service Group for the rule in the right pane as shown below and save the changes:
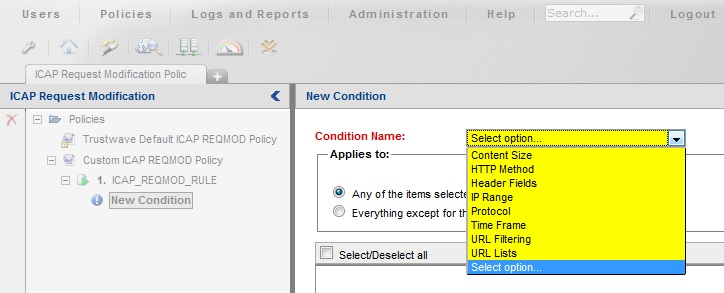
19. Right-click the new rule in the left pane and choose Add Condition.
Then choose from the list of available conditions in the right pane to define new behavior accordingly:
Repeat steps 18-19 to add more rules to your custom ICAP Request Modification policy.
20. Navigate to Policies > Device Policies > ICAP Response Modification.
21. Right-click Policies in the left pane and choose Add Policy to create a new ICAP Respmod policy.
22. Define a name for the policy, save the changes and make sure it appears in the list of policies in the left pane.
23. Right-click the new policy and choose Add Rule.
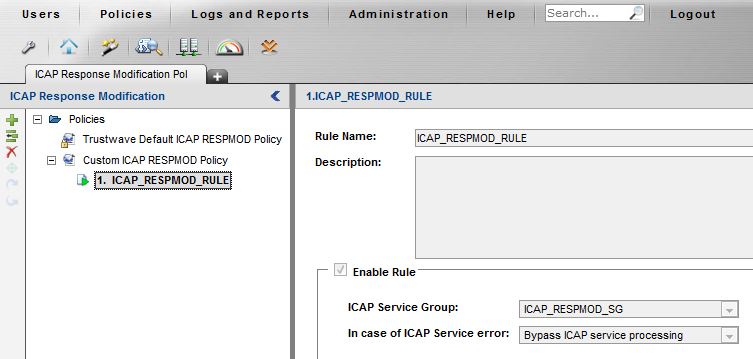
24. Set the correct ICAP Service Group for the rule in the right pane as shown below and save the changes:
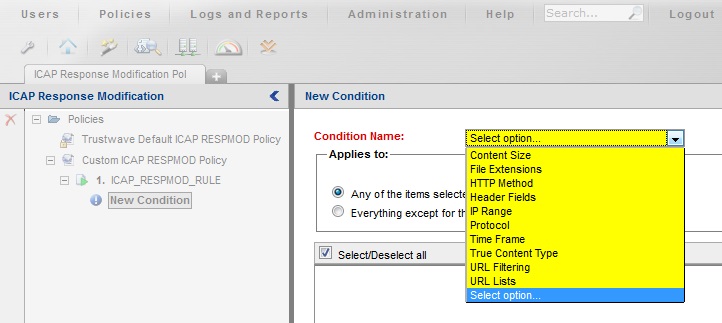
25. Right-click the new rule in the left pane and choose Add Condition.
Then choose from the list of available conditions in the right pane to define new behavior accordingly:
If necessary, repeat steps 24-25 to add more rules to your custom ICAP Response Modification policy.
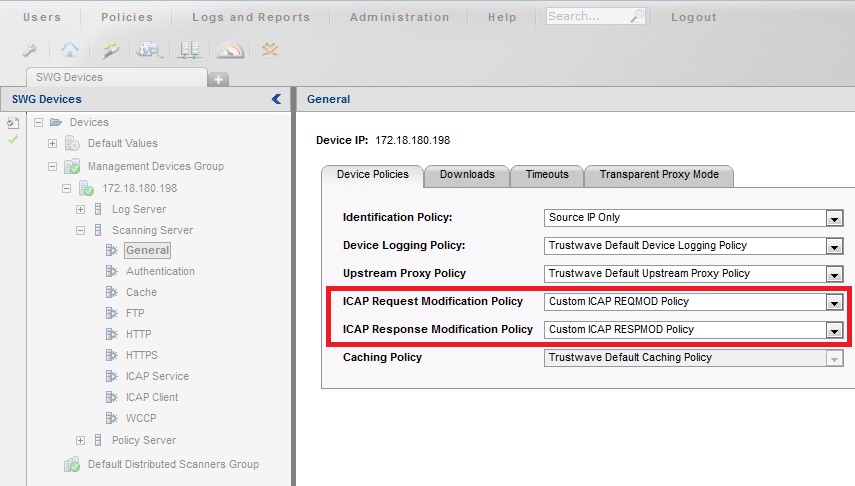
26. Finally, make sure that the SWG scanner is using the new custom policies defined for ICAP Request/Response modification:
Navigate to Administration > System Settings > SWG Devices. Under the Scanning Server > General, set the ICAP Request/Response modification policies accordingly: