This article applies to:
- SWG 10.x - Policy Server / All-In-One
- SWG 11.x - Policy Server / All-In-One
Question:
- How do I change the IP address for a Policy Server / All-In-One device?
Procedure:
The change is performed in two stages:
1) The IP address is changed on the networking interface, using the relevant Limited Shell commands.
2) The IP address is changed in the SWG database by an update in the SWG GUI.
These stages are detailed in the following steps:
1. Open the SSH connection to the SWG device using its current IP address, and run the config_network command.
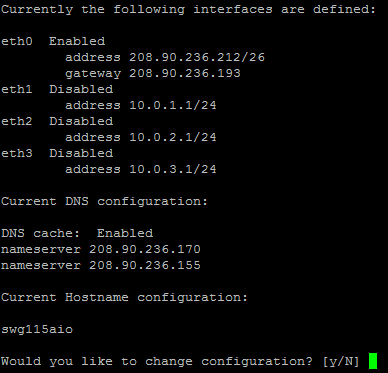
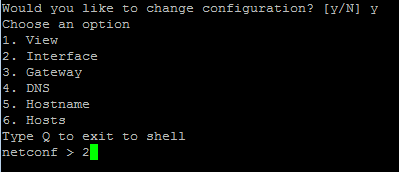
2. Type 'Y' to view further options, and then type '2' to view the interfaces currently defined in the system.
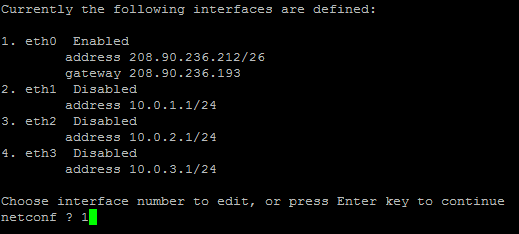
3. Choose the option for the interface you want to change; in this case it is interface eth0. Type '1'.
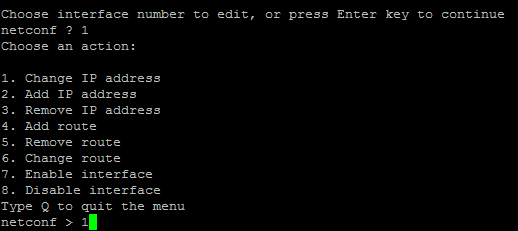
4. Type '1' to change the IP address.
5. Type the new IP address; in this case it is 208.90.236.220/26.

6. Review the new configuration details and type 'Y' to save it:
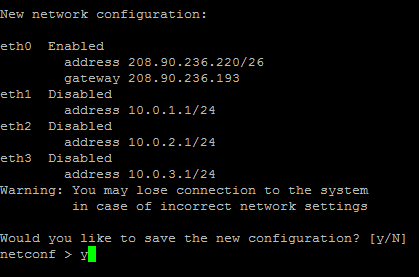
7. With this change enabled you should expect the SSH connection to fail. Try to open a new SSH connection using the new IP address to make sure that the change worked.
Proceed with the update of the new IP address in the database, using the SWG GUI:
Note: The IP address change has been already performed at the networking level, so you should access the GUI using the new IP address.
8. In the GUI, navigate to the SWG Devices section and highlight the Policy Server device IP.
The left pane should still show the old IP address.
9. Click Edit, and make sure the Device IP in the right pane shows the new IP address.
10. Save and commit the changes.
