This article applies to:
Question:
- What is the procedure for changing the IP address of a Secure Web Gateway (SWG) appliance running as a Policy Server/All-In-One device?
Reply:
Below is a simple procedure for changing the IP address of SWG Policy Server/All-In-One devices.
1. Start a new SSH session on the SWG device and run the config_network command from the Limited Shell, as shown below:

2. Type Y to change the configuration and choose option 2 – Interface.
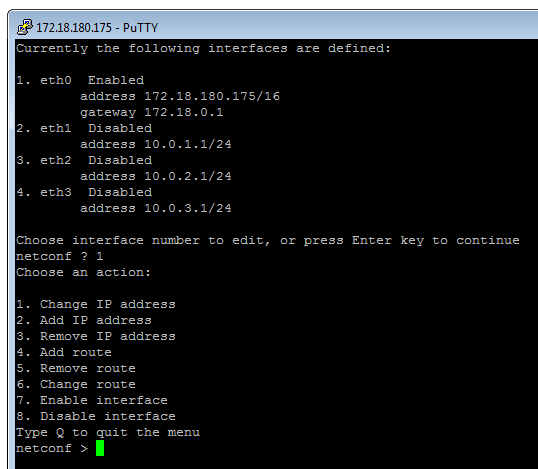
 3. To change the eth0 interface, choose 1 from the menu and then choose the 1. Change IP address option:

4. Type the new IP address including the netmask in CIDR format (slash notation), and press Enter to continue:

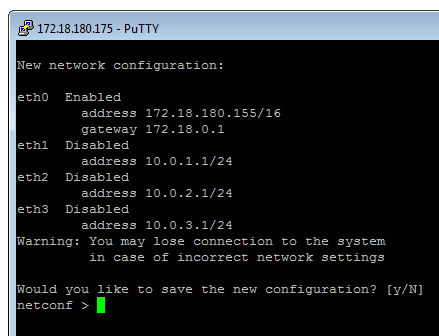
5. When a screen with the new network configuration opens as shown below, type Y to save the configuration changes:

The SSH session will become non-functional at this point due to the network changes. Also, the GUI should work now only with the new IP address.
6. Navigate to the GUI using the new IP address, and go to Trustwave Devices.
At this point two different IP addresses will show for the device. The old IP address will appear in the Devices tree on the left, and the new IP address will show in the Device IP field on the right:
7. With the IP of the device selected in the tree on the left, click the Edit button in the right pane. Then select the new IP from the Device IP drop down list.
8. Save and commit the changes. The system should update the IP address.